

Prerequisites
To start a workflow, you will require two things- A SampleHC API key (see Authentication)
-
The slug (unique identifier) of the workflow you want to start
To find a workflow slug, from the workflow page, click the Edit button at the top right.
On the edit page, next to the title of the workflow (e.g., Sample Workflow Template), you will see the slug (e.g.,
sample-workflow-template).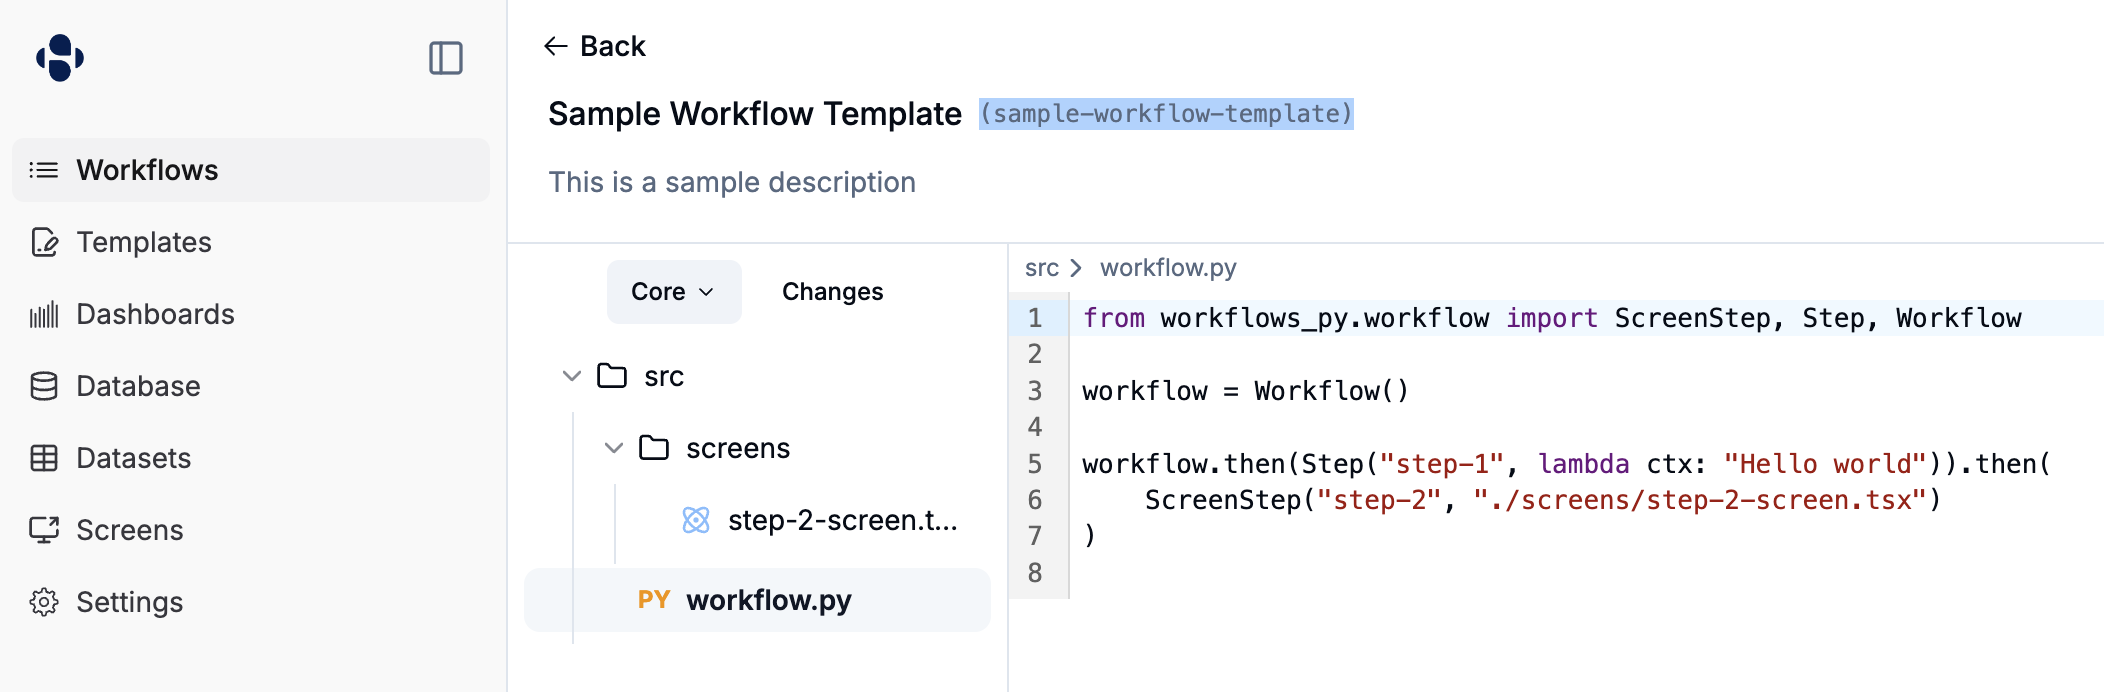
Making a request
Below are examples of how to start a workflow with different types of request bodies. Remember to replaceYOUR_API_KEY with your actual API key and <my-workflow-slug> with the slug of your workflow.
Using application/json
If you want to send data as a JSON object, use the Content-Type: application/json header. The body should be a JSON object, optionally containing a startData field.
Using multipart/form-data
If you need to include files or send data as form fields, use multipart/form-data. curl will set the Content-Type header automatically when you use the -F option.
Any form fields you send will be collected into the startData. If you send files, they will be processed and their resulting identifiers or content will also be part of startData.
Response
A successful request returns the ID of the new workflow run, which you can use to check its status or cancel it later:- workflowRunId: The ID of the newly started workflow run.
- nextTaskId: The ID of the first task in the workflow run, or
nullif the workflow completes synchronously or has no starting task.
Starting a Workflow from Another Workflow
Workflows can also start other workflows directly through the SDK. This is useful for kicking off a follow-up process while the current workflow continues.Start Data Schema
Thestart_data_schema field in a workflow definition allows you to specify the expected structure and validation rules for data sent when starting a workflow. This schema follows the JSON Schema specification and helps ensure data quality and provides clear documentation of expected inputs.
Simple Schema Examples
Here are some basic examples ofstart_data_schema definitions:
Basic Form Fields
File Upload Schema
Multiple File Upload Schema
For workflows that need to accept multiple files at once, use an array field withx-formFieldType: "multi-file":
Complex Schema Examples
Medical Workflow with Nested Objects
Schema with Hidden Fields
Hidden fields are useful for system-generated values that should be included in the workflow data but not shown to users in the form:workflow_id, created_by, and internal_notes are hidden from the form but can be populated programmatically when the workflow starts.
Business Process Schema with Arrays and Enums
Custom Form Field Extensions
Sample supports custom extensions to enhance form generation:x-formFieldType: Specifies the UI component type (e.g., “file”, “date”, “select”)x-formFieldLabel: Custom label for the form fieldx-formFieldOrder: Controls the order of fields in generated formsx-formFieldPlaceholder: Placeholder text for input fieldsx-formFieldHidden: Hides the field from the generated form (useful for system-generated values)
Schema Validation Benefits
Usingstart_data_schema provides several advantages:
- Data Validation: Ensures incoming data meets your requirements before workflow execution
- Documentation: Serves as clear documentation of expected workflow inputs
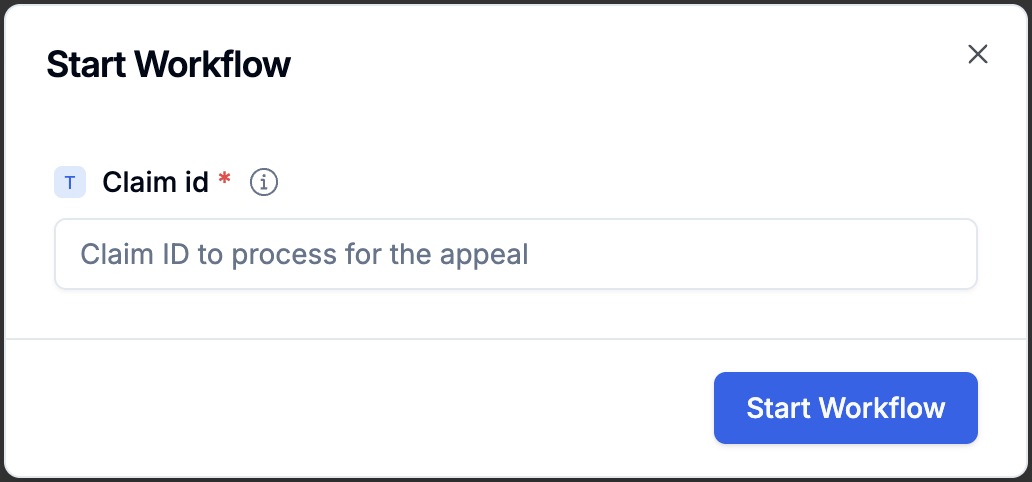
- Automatic form creation: Start data automatically creates a form so there’s no additional workflow updates needed
Cron Scheduling
Cron schedule functionality requires samplehc >= 0.3.0 and workflows-py >= 0.1.19 and requires an updated
lambda_handler.py file.cron_schedule parameter in the Workflow constructor.
Setting Up Cron Scheduling
To schedule a workflow to run automatically, pass a cron expression string to thecron_schedule parameter:
Cron Expression Format
Cron expressions use five fields separated by spaces:Common Cron Examples
Scheduled Workflow Behavior
When a workflow runs on a cron schedule:- The workflow starts automatically at the specified time
- No manual trigger or start data is required unless specified in
start_data_schema - The workflow runs with an empty start data context unless configured otherwise
- Multiple scheduled instances can run simultaneously if the schedule frequency is higher than workflow execution time
Combining Cron Scheduling with Start Data Schema
Cron scheduling works alongside start data schemas to provide structured data to scheduled workflows:Best Practices for Scheduled Workflows
- Use appropriate timing: Consider system load and business hours
- Handle failures gracefully: Include error handling for automated runs
- Set up monitoring: Track scheduled workflow execution and failures
- Test thoroughly: Verify cron expressions work as expected before production
- Consider time zones: Ensure cron times align with business requirements
- Use start data defaults: Provide sensible defaults in your start data schema for scheduled runs
Monitoring Scheduled Workflows
Scheduled workflows appear in the workflow dashboard just like manually triggered workflows. You can:- View execution history and status
- Monitor for failed scheduled runs
- See the next scheduled execution time
- Manually trigger workflows outside of their schedule if needed